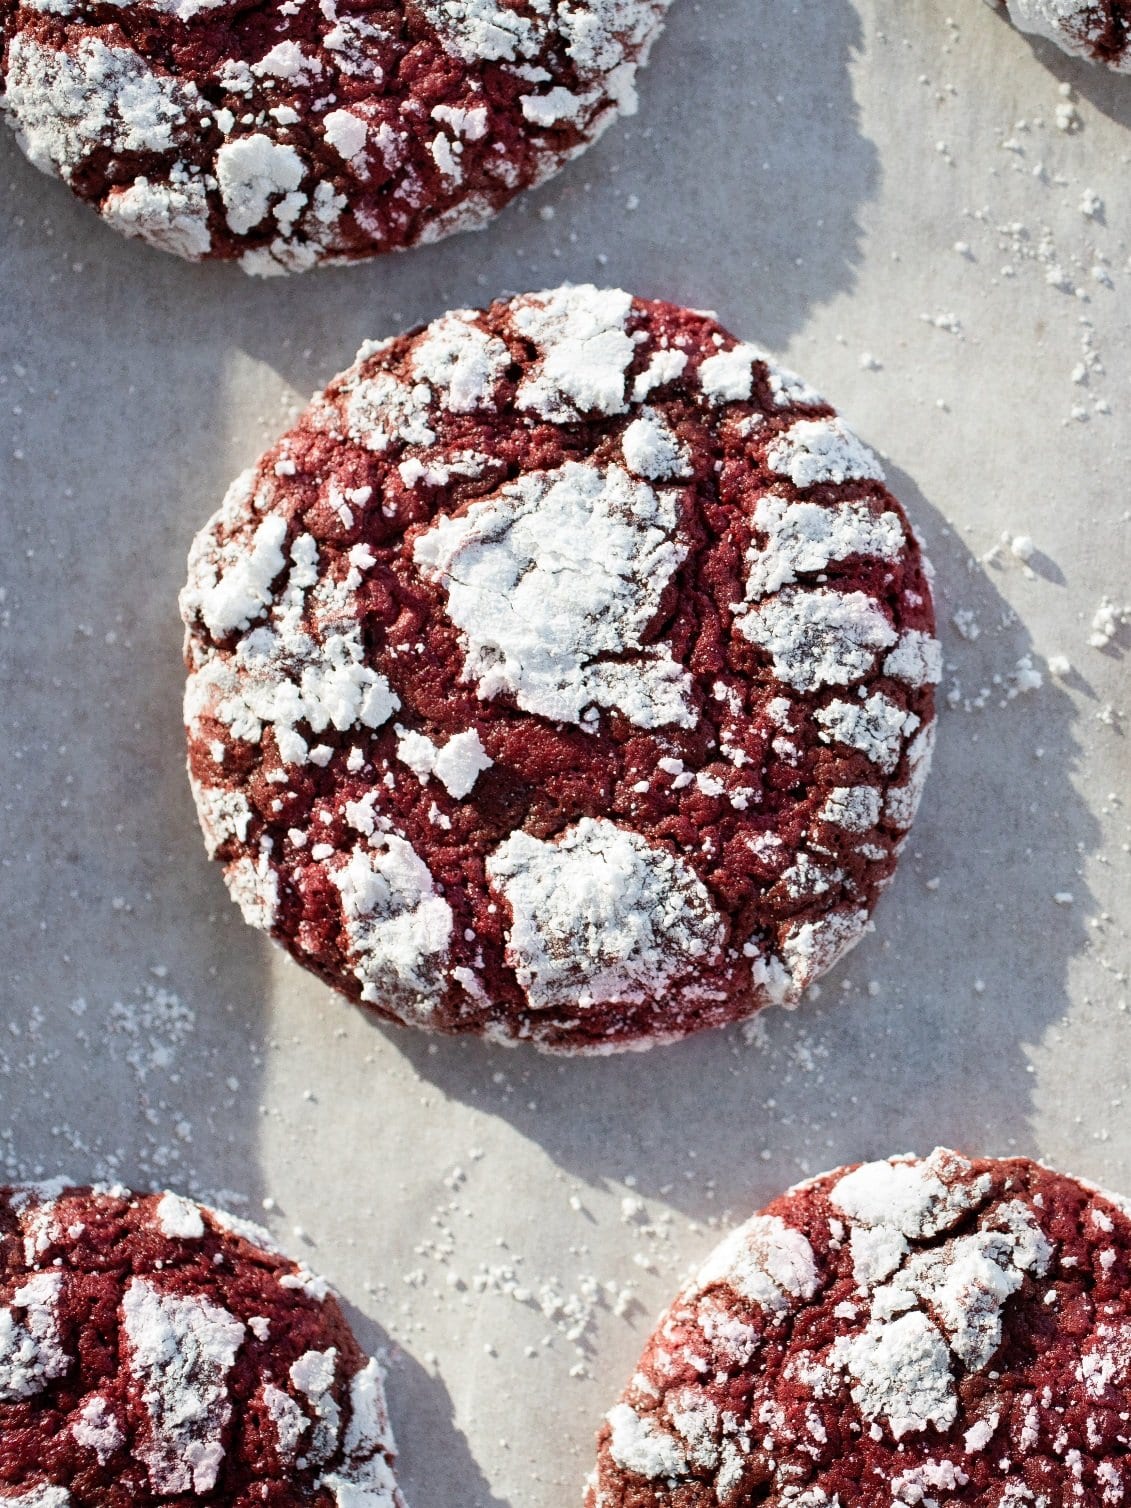
This red velvet cookie recipe comes from my cookbook, Baking For the Holidays. Like traditional chocolate crinkle cookies, they’re rolled in powered sugar and when baked, and cracks break through the surface giving them their beautiful snowy look. They’re so chocolatey and fudgy in the center, with a hint of vanilla to keep them classically red velvet.
You’ll notice these cookies are actually a shade of burgundy (how I like my red velvet to be), but you can add extra red food coloring if you want them to be more vibrant.
I will be on Cherry Bombe Radio’s new mini series She’s My Cherry Pie, hosted by Jessie Sheenan, this Christmas Eve. I’ll be talking about these Red Velvet Crinkle Cookies, my Holiday Cut-Out Cookies, and cookie baking in general. Tune in if you can!
Ingredient Notes for Red Velvet Crinkle Cookies:
- All-Purpose Flour: Make sure your all-purpose flour is not too high or low in protein; I like to use Gold Medal unbleached all-purpose for cookie baking. At 10.5 percent protein it is a good, moderate choice to keep baked goods tender.
- Unsalted Butter: I use unsalted butter in my recipes so I can control the salt content. This recipe uses both salt in the dough and sprinkled on top before baking, so unsalted works well here in order to keep the cookies from getting too salty.
- Food Coloring: I use a red Bakery Emulsion when making Red Velvet baked goods; it gives a good red color and adds an extra flavor that is slightly both chocolate and citrus-y. If you can’t find it, or want to use straight up food coloring, a gel food coloring works best here for deep color.
- Extra Eggs Yolks: I like to add extra egg yolks; they add richness and help with the fudgy texture.
- Canola Oil: I like to use some canola oil when I can in recipes that call for cocoa powder; I find it helps keep them tender over time.
More Cookie Recipes:

Fudgy Red Velvet Crinkle Cookies (no mixer!)
Ingredients
- 1½ cups (213 grams) all-purpose flour
- 1 teaspoon baking powder
- 1/8 teaspoon baking soda
- ¾ cup (150 grams) plus 3 tablespoons granulated sugar
- ½ cup (100 grams) light brown sugar
- 2 large eggs plus 2 large egg yolks at room temperature
- 1 tablespoon canola oil
- 1 tablespoon Red Velvet Bakery Emulsion or red food coloring
- 1 teaspoon pure vanilla extract
- ½ teaspoon salt
- 4 tablespoons (57 grams) unsalted butter
- 3 ounces (85 grams) semisweet or bittersweet chocolate
- ¼ cup (25 grams) cocoa powder
- ½ cup (60 grams) confectioners’ sugar
Equipment
Instructions
- In a small bowl, whisk together the flour, baking powder, and baking soda.
- In a large bowl, whisk together ¾ cup (150 grams) of the granulated sugar, the brown sugar, eggs, egg yolks, canola oil, Red Velvet Bakery Emulsion, vanilla, and salt.
- Place the butter and chocolate in a small, heavy-bottom saucepan over low heat and melt together, stirring frequently to prevent the chocolate from scorching. Continue cooking until the mixture is smooth. Off the heat, add the cocoa powder to the chocolate and whisk until completely combined, about 45 seconds (the mixture will be thick).
- Add the warm chocolate-butter mixture to the egg mixture and whisk together until combined. Add the flour mixture and use a rubber spatula to mix gently until combined. Cover the dough and chill the mixture for at least 6 hours and up to overnight.
- Adjust an oven rack to the middle position and preheat the oven to 350°F (180°C). Line three sheet pans with parchment paper.
- In a small bowl, combine the confectioners’ sugar and the remaining 3 tablespoons of granulated sugar. Scoop the dough into 1½ tablespoon portions (see note) and roll the dough in the sugar mixture. Place eight cookies on each sheet pan and bake one pan at a time, rotating halfway through baking. Bake until the edges are set and the cookies are puffed but still soft in the center, 12 to 14 minutes. Move the sheet pans to a wire rack and let the cookies cool to room temperature. Cookies can be stored in an airtight container at room temperature for up to 3 days.
Notes
- The dough is very sticky, so using a cookie scoop works best here; I like to drop the dough balls into the powdered sugar and then gently roll them. Once they are covered, they are easy to pick up. If you don’t have a cookie scoop, you can refrigerate the dough for 15 minutes or so to help it scoop more easily.
- Reprinted from my Baking for the Holidays cookbook, with permission from Chronicle Books.











11 Comments
Catherine S
Sunday, February 25, 2024 at 9:01 amLove this recipe! I made them to share with friends so instead of 20 large cookies, I made 40 smaller cookies. I will definitely make these again.
Cathi
Tuesday, January 2, 2024 at 6:49 amI put these cookies in my Chris trays sent to friends and neighbors and received a text from a neighbors daughter with a pic of the cookie half eaten and said this is the BEST cookies I’ve ever eaten!!
Mia
Tuesday, December 5, 2023 at 9:36 amDo these freeze well?
Kelly Kardos
Sunday, November 26, 2023 at 4:31 pmIs it possible to put a link for the red emulsion? There are a few different options and I’ve never used it before. Thanks Sarah
Sarah Kieffer
Monday, November 27, 2023 at 9:24 amHello! This one works great, otherwise I’ve had success with regular food coloring as well.
Kelly
Tuesday, November 28, 2023 at 10:05 amThank you!!!
Kathryn
Sunday, November 26, 2023 at 1:53 pmWhen I made these cookies yesterday, I refrigerated the dough for 6 hours. Then I rolled small portions into balls, then rolled in powdered sugar before baking. When I took my cookies from the oven, they had spread out large and somewhat puffed. As they cooled, they became flat. Can you give me some ideas as to what I possibly did wrong?
Bree
Wednesday, October 4, 2023 at 9:42 pmDo the cookies crinkle like that when they’re cool?
Jenna
Saturday, February 11, 2023 at 9:50 pmHi there I am looking to make these cookies and wondering if the coco powder is Dutch processed or natural?
Sarah Kieffer
Sunday, February 12, 2023 at 12:40 pmhello! it is dutch processed.
Sabrina
Friday, January 13, 2023 at 8:28 pmgreat mix of flavors, red velvet and chocolate, and love red velvet, so thank you!