

“A big jug of coffee had just been set in the hearth, the seed-cakes were gone, and the dwarves were starting on a round of buttered scones, when there came – a loud knock.” -JRR Tolkien, The Hobbit
I make scones for every possible occasion, as they can be shaped ahead of time and frozen, then pulled out and baked as needed. I like them plain, packed with fruit, dusted in sugar, coated in icing, studded with chocolate and white chocolate and more chocolate, dotted with crystallized ginger and dried cranberries and poppy seeds and candied orange.
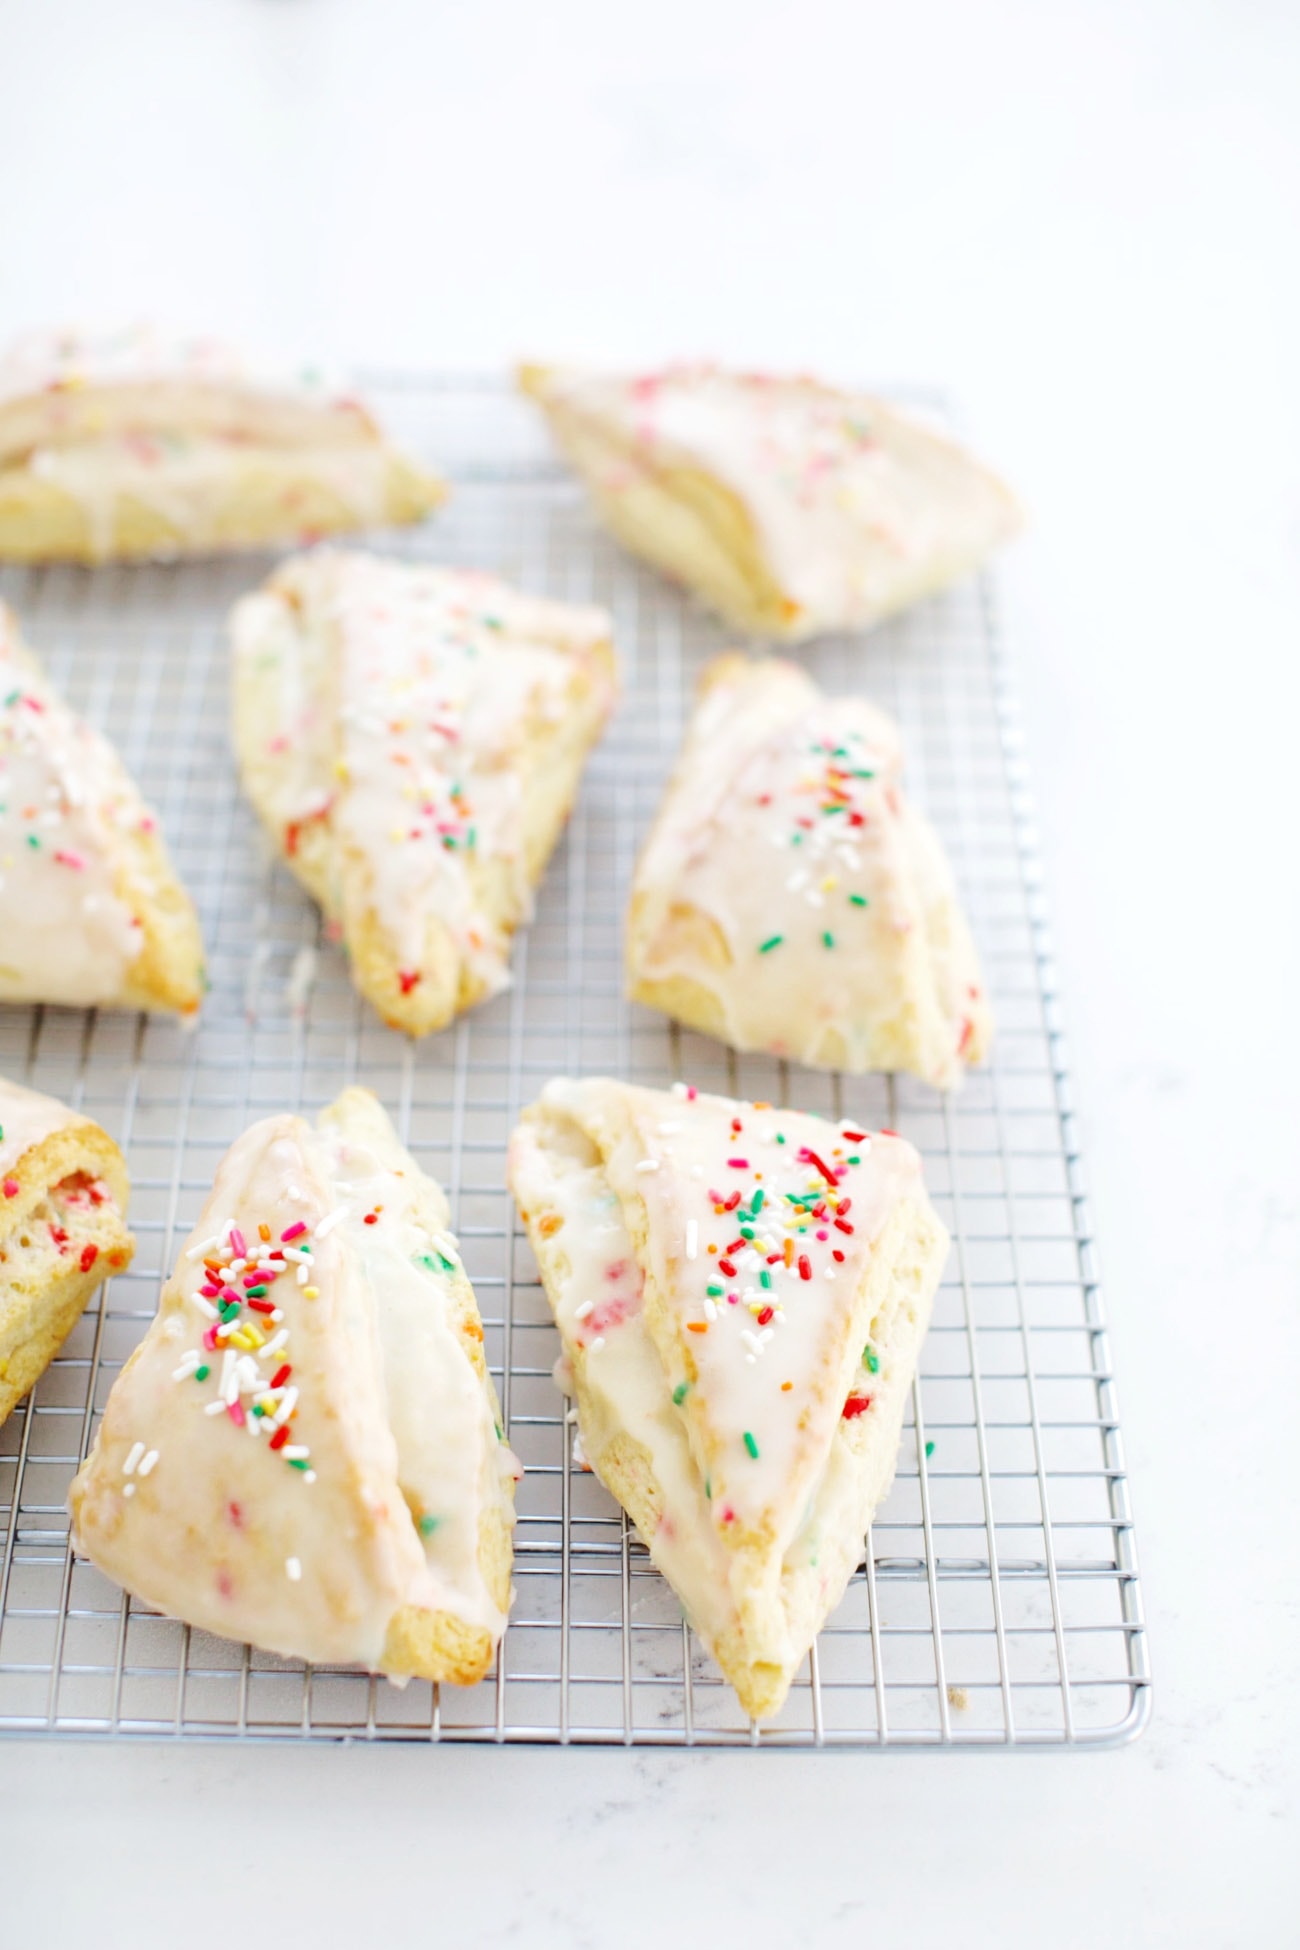
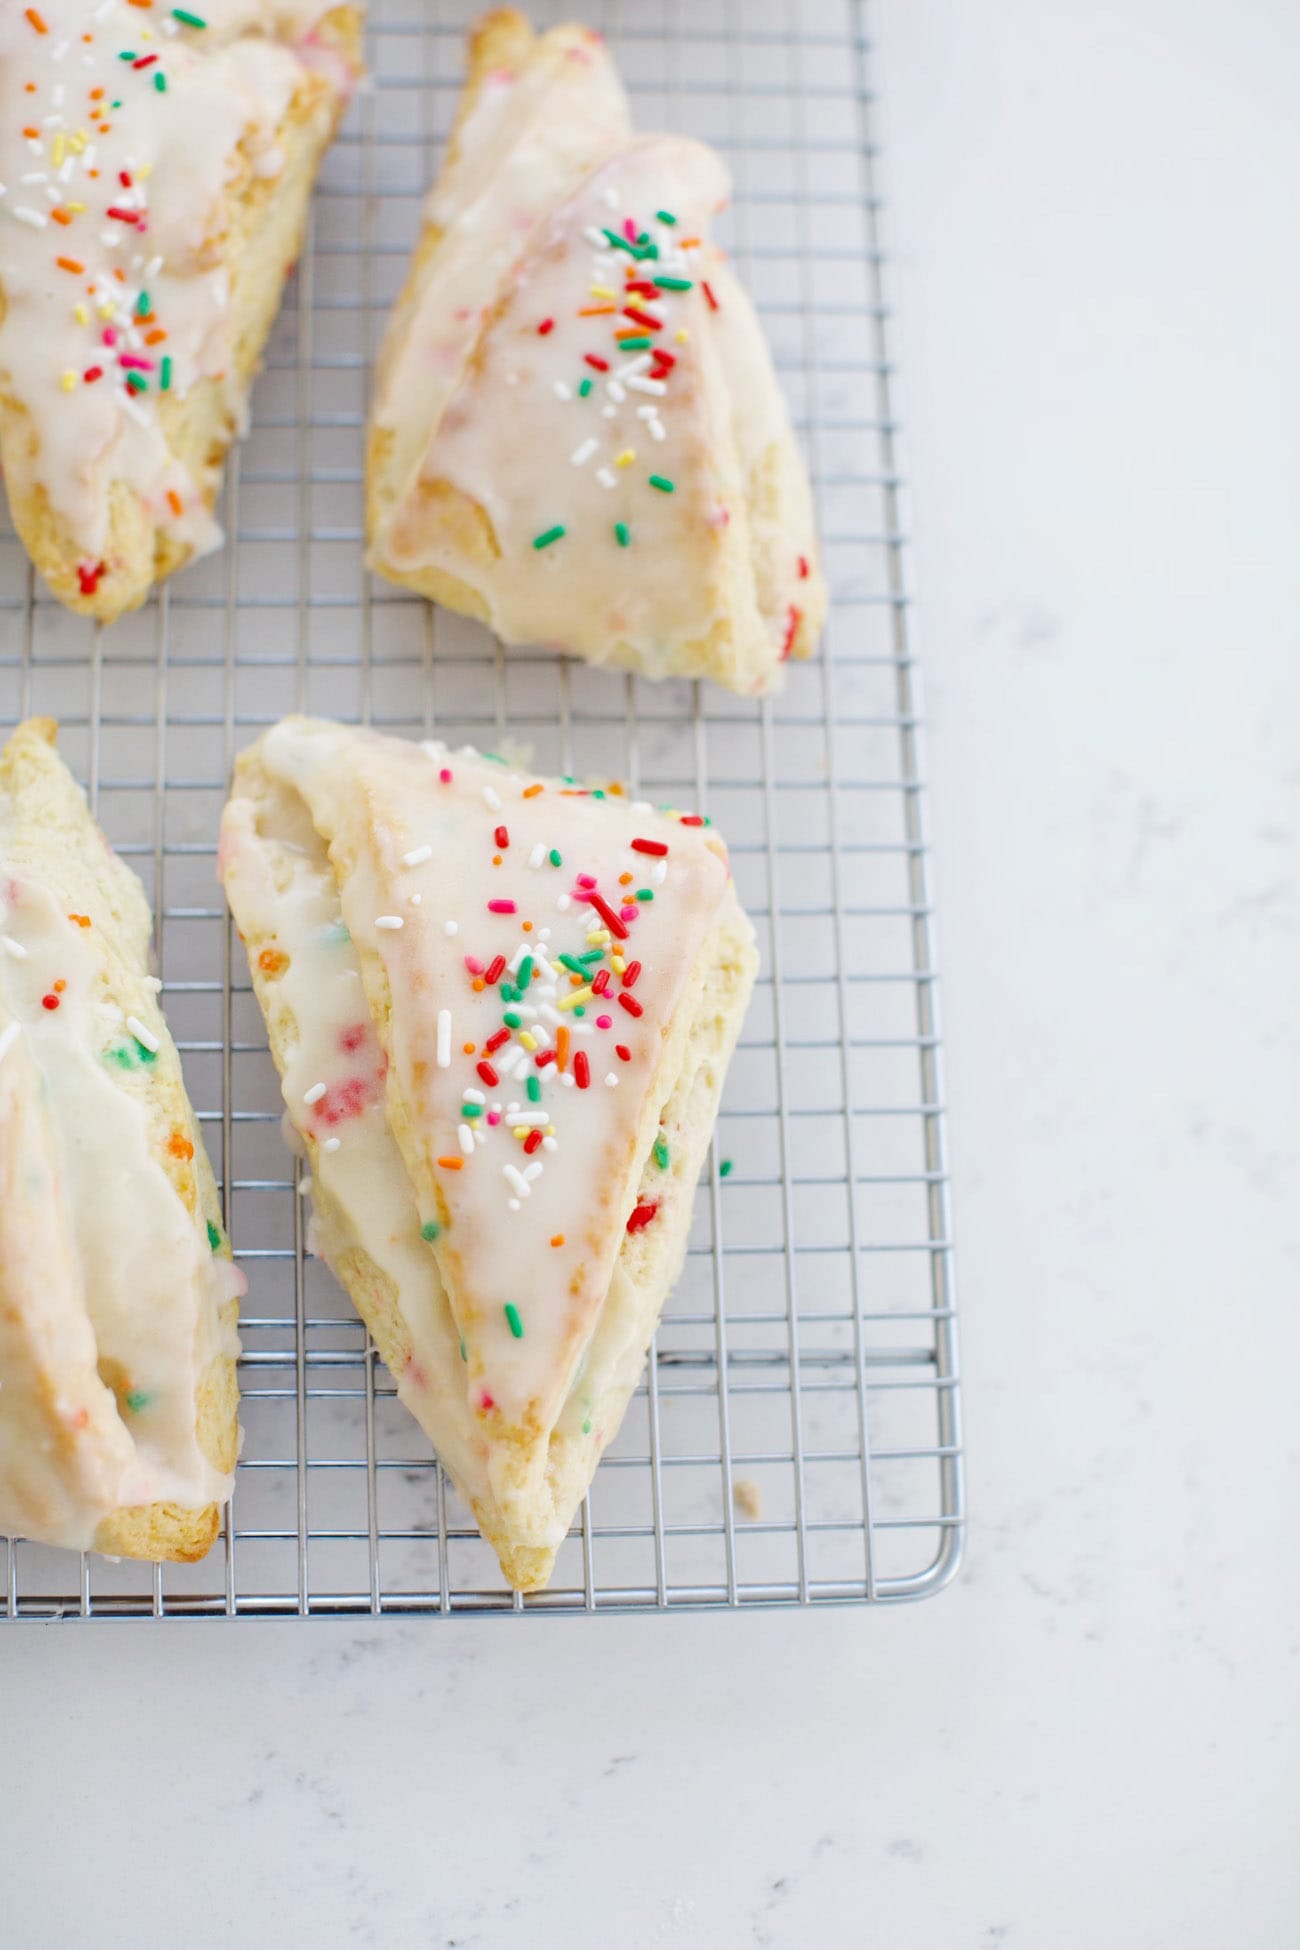
And while Bilbo probably wouldn’t add sprinkles to his scones, I often do, because I have two little nieces whose eyes light up at the sight of rainbow specks on pretty much anything. My two teenage children also will gravitate towards sprinkle treats as well. These scones are soft, tender, and delicious.
Scone Technique
I had been making scones the same way for years – an adaption of Ina Garten’s Strawberry Scones from her first cookbook, The Barefoot Contessa. However, I changed things up after stumbling upon a genius idea from Cook’s Illustrated. Their scone recipe included folding the dough over several times to create multiple flaky layers. I applied this technique to my tried and true recipe, and my perfect scone was born.
NOTE: Putting another baking sheet nestled directly underneath the one the scones are on helps keep the bottoms of the scones from browning too quickly before they fully bake. If you like the bottoms extra crisp, you can just use one pan.
More Scone Recipes:
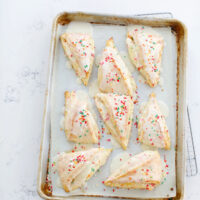
Sprinkle Scones with Icing
Ingredients
- ½ cup [120 g] heavy cream plus more for brushing
- 1 large egg
- 1 teaspoon pure vanilla extract
- 2 ¼ cup [320 g] all-purpose flour
- ¼ cup [50 g] granulated sugar
- 1 tablespoon baking powder
- ½ teaspoon salt
- 12 tablespoons [1 ½ sticks or 170 g] unsalted butter cold, and cut into ½ in [12 mm] pieces
- 1/3 cup [50 g] sprinkles
Icing
- 1 tablespoon unsalted butter melted
- 2 tablespoons water
- 1 teaspoon pure vanilla extract
- Pinch salt
- 1 ¼ cup [150 g] confectioners’ sugar
- Sprinkles for sprinkling
Instructions
- Line a sheet pan with parchment paper. In a medium bowl or liquid measuring cup, whisk together the heavy cream, egg, and vanilla. Set aside.
- In the bowl of a stand mixer fitted with a paddle, combine the flour, sugar, baking powder, and salt. Add the butter and mix on low speed until the flour-coated pieces are the size of peas.
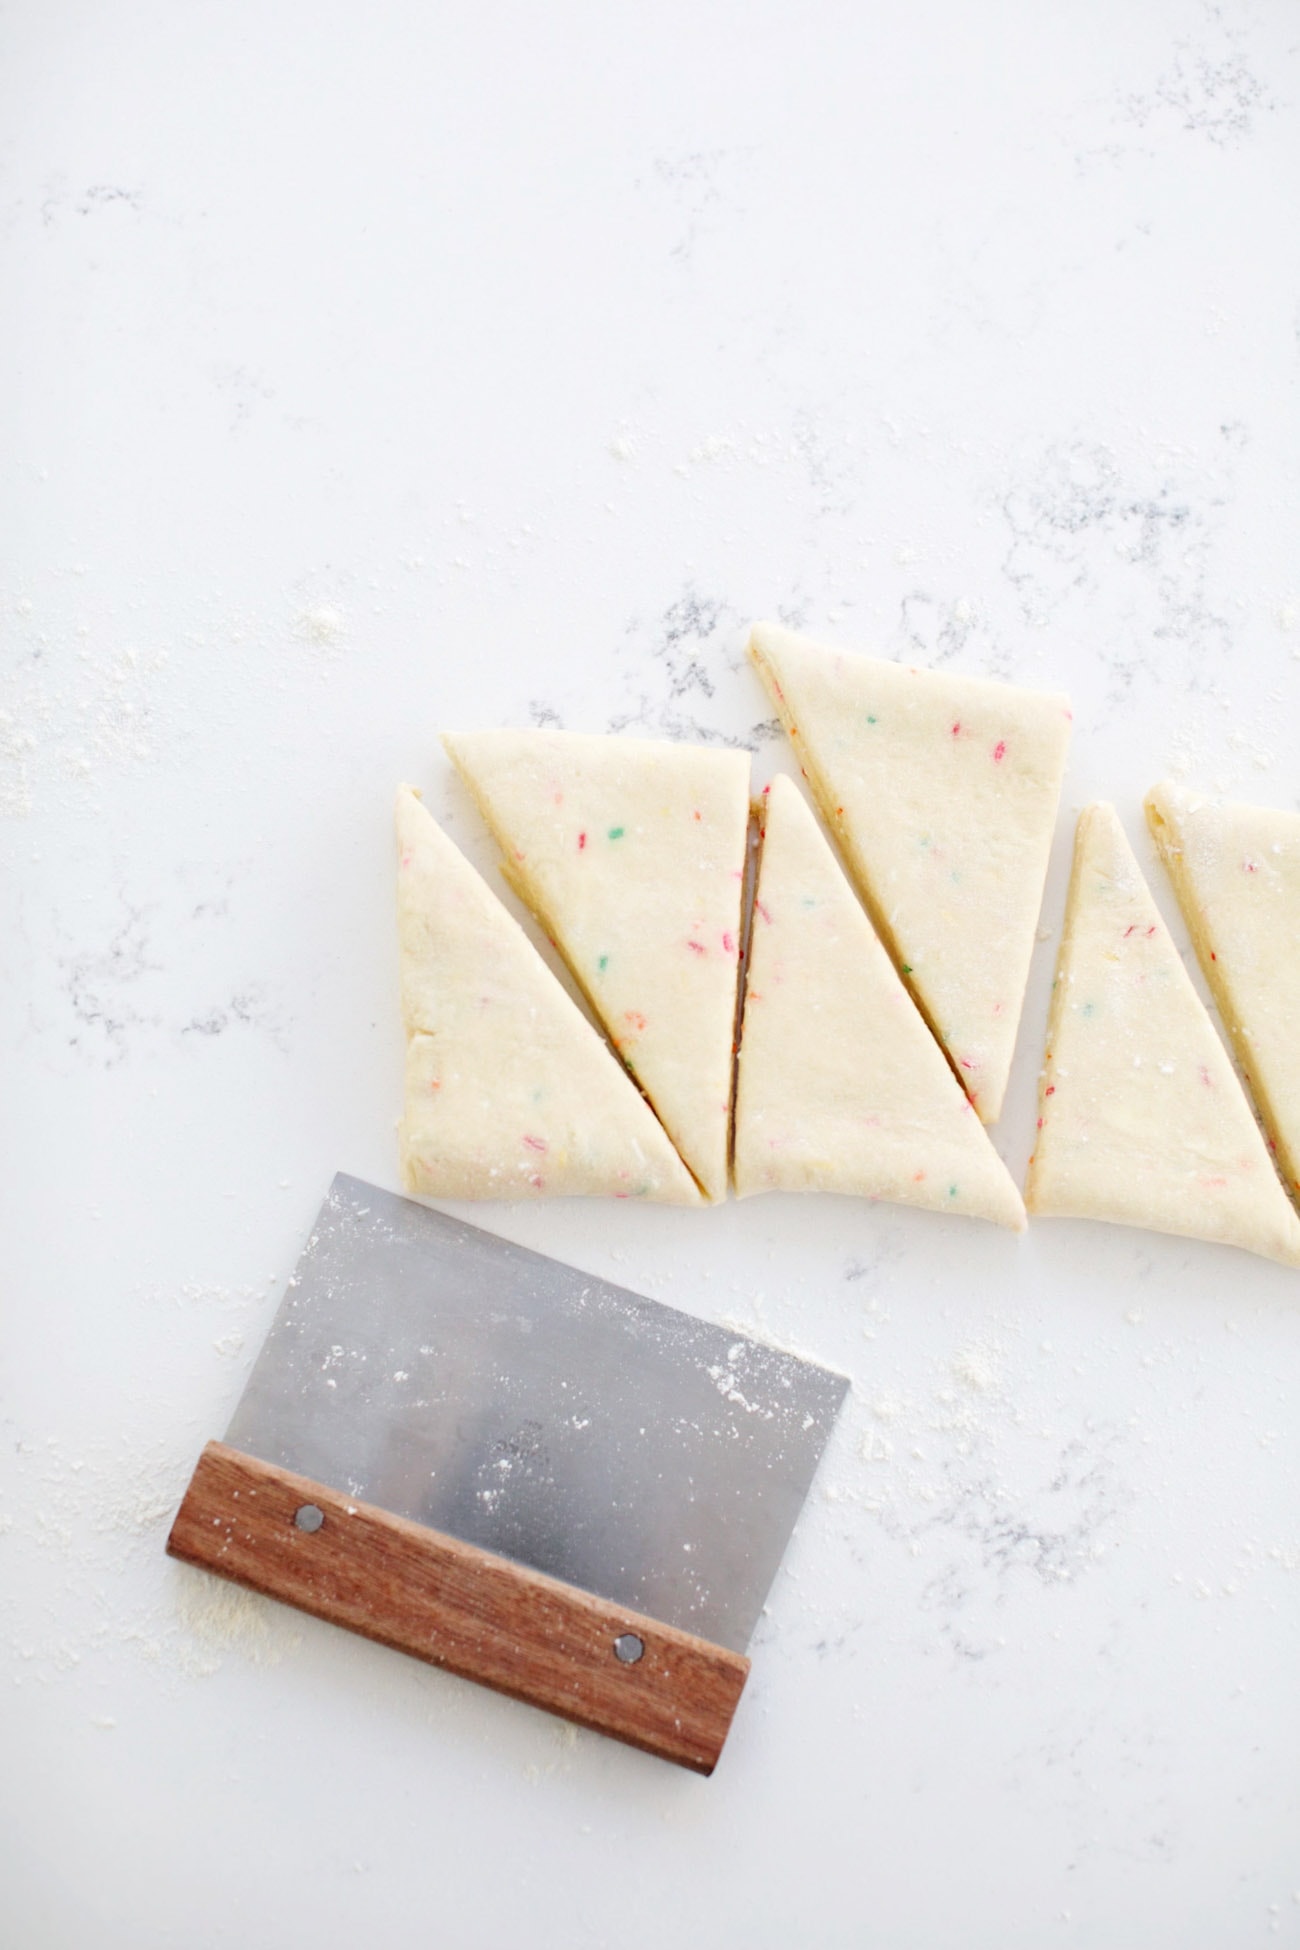
- Remove the bowl from the mixer and use a spatula to fold the wet ingredients into the dry until just combined. Add the sprinkles and mix again until combined. Transfer the dough to a lightly floured surface and knead four to six times, until the dough comes together, adding more flour as necessary if the dough is sticky. Pat the dough gently into a square and roll it into a 12 in [30.5 cm] square, dusting with flour as necessary. Fold the dough in thirds, like a business letter. Fold the dough in thirds again by folding in the short ends, making a square. Transfer it to the prepared sheet pan and put it in the freezer for 10 minutes. You can watch a video here to see how to do this step.
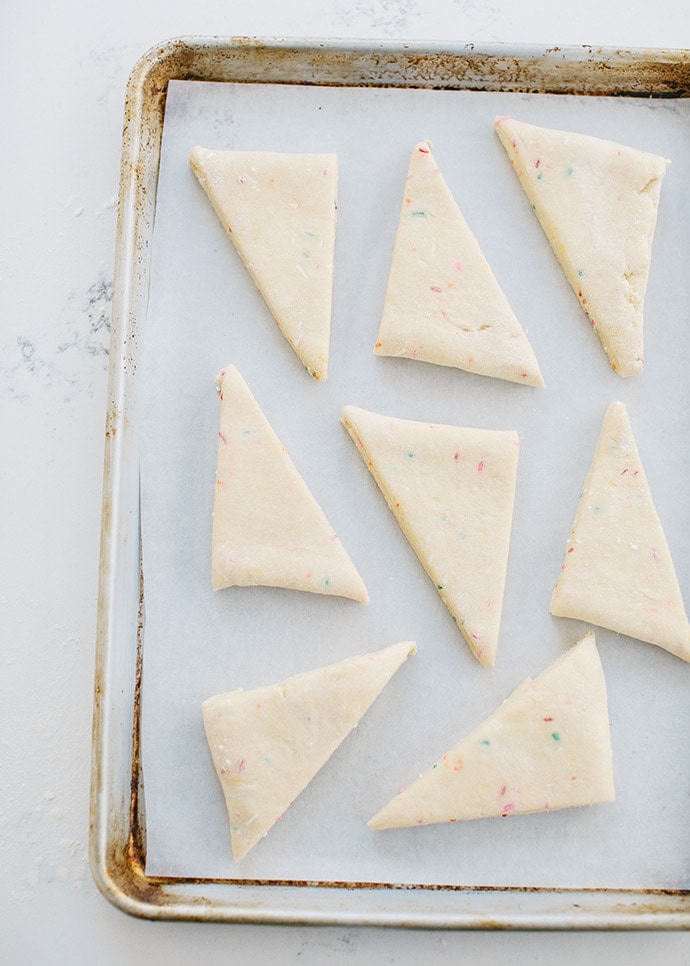
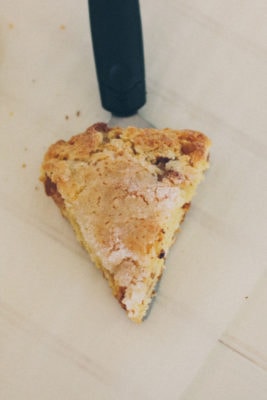
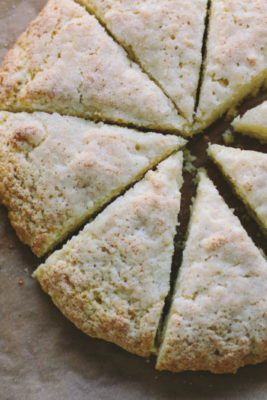
- Return the dough to the floured surface, roll it into a 12 in [30.5 cm] square, and fold it in thirds. Turn over the dough so it’s seam-side-down, and gently roll out the dough into a 12 by 4 in [30.5 by 10 cm] rectangle. With a sharp knife, cut it crosswise into four equal rectangles, then cut each rectangle diagonally into two triangles. Transfer the scones to the prepared sheet pan and freeze the scones while the oven is preheating.
- Meanwhile, position an oven rack in the middle of the oven and preheat the oven to 375F [190C]. Stack the sheet pan with scones on another sheet pan. Brush the tops of the triangles with a little heavy cream, making sure it doesn’t drip down the sides. Bake until the tops and bottoms are light golden brown, rotating the pans halfway through, 18 to 25 minutes.
- For the icing: While the scones are baking, in a medium bowl, whisk together the melted butter, water, vanilla, and salt until smooth. Add the confectioner’s sugar and use a spatula to mix together, then whisk until well combined and smooth. Add more water, one tablespoon at a time, to thin the icing to your preferred consistency; the icing should be thick but pourable.
- Transfer the top sheet pan to a wire rack and ice the scones immediately, using the back of a spoon or offset spatula. Sprinkle the tops with sprinkles. Scones are best eaten the same day they are made.
9 Comments
Jayne
Saturday, February 15, 2025 at 11:14 amHi Sarah
Would these work as well if they go in the fridge and not the freezer. Here in the UK freezers are much smaller and I would be able to put the scones in mine. I am intrigued by the use of heavy (double) cream in your recipe and would like to try it.
Thank you
KK
Tuesday, December 26, 2023 at 8:16 amThese were soo yummy!!! So glad I made this recipe! I was looking for vanilla bean scones, so I omitted the sprinkles and used vanilla bean paste in the scones and icing and they were perfect!!! Thank you!
Michael
Sunday, August 27, 2023 at 7:02 pmI’ve made these twice and they are perfect– great texture, perfect level of sweetness, and easy to make.
Patty Campbell
Sunday, August 20, 2023 at 9:08 amWhat brand of sprinkles do you use? Yours don’t seem to bleed and turn everything grey.
And thanks for adding a great technique to the scone recipe, I hope to make scones soon.
Sarah Kieffer
Sunday, September 17, 2023 at 1:26 pmI find jimmies works best – they are a little larger and don’t bleed into the batter as much as the smaller sprinkles. I often use the Wilton ones or Target brand.
Angela
Friday, August 18, 2023 at 2:57 pmDelicious scones!!!
Sue
Thursday, August 17, 2023 at 10:18 amLovely photography, but true scones are not sweet. They should be the texture of American baking powder biscuits. If you want to make cookies, make cookies. (There are plenty of traditional UK recipes for cookies loaded with butter+flour+sugar studded with glaced fruit and nuts).
As far as Ina Garten and CI recipes are concerned, they probably got started with the Cream Scone recipe from Fanny Farmer’s 1930’s Boston Cooking School Cookbook. A few small tweaks and they claim to have created their own recipe.
Sarah Kieffer
Thursday, August 17, 2023 at 12:01 pmHi Sue, I appreciate your dedication to the history of the scone, but I think at this point what is known as the “American scone” is an acceptable evolution of this baked good. For decades now, American bakeries (even respectable ones) have been selling scones plump full of chocolate, white chocolate, sugar, and yes, even sprinkles. Hundreds of cookbooks are filled with recipes with this type of scone. Even today, thousands of people started their morning with such a treat. I truly don’t write this in any way to be snarky or defensive, but I would argue that labeling my recipe as “scone” is warranted. (And yes, I could make cookies, but they are very different from scones texture-wise, and wouldn’t be a great replacement.) I do understand your frustration, as several English friends of mine have expressed similar sentiments, and I do know the pain of watching something I love be adapted or changed into something I loathe (for me, The Lord of the Rings book to the movie). But, we do only live once, and when I see a good friend so moved by Peter Jackson’s abomination, I have to let go and live and let live. I wish you much peace, Sarah
Jayne
Saturday, February 15, 2025 at 11:11 amHi Sue
There is very little sugar in UK scones, a true scone is not sweet. Yes they can have additions like fruit but very little sugar.