
It took me a long time to feel confident making pies. I never actually made one until my late twenties, as they had seemed so daunting and time consuming; so much work for something that had such a high percentage of not turning out right. My first attempt actually was incredible: I made a perfect apple pie. The crust was flaky and golden brown, the filling perfectly cooked, with apples soft but not mushy.
I remember bringing it to my Grandma’s house, and she raved and raved about it (she may have mentioned it was better than the pie my mom made) and I’m pretty sure she ate the rest of it for dinner that night. Brimming with confidence, I made another pie the next day: same recipe, same apples, same kitchen equipment, and alas, it was a total disaster.
I’ve discovered I often have beginners luck with baking, only to completely mess up whatever I am making the next time I go to bake it. I think it’s the grace of the kitchen gods: they know of my love and need for baking, but also my lack of patience and follow through. I’m notorious on giving up on something if I don’t get it right away. They let me succeed once, giving me false confidence of my abilities, and then the next several times I just can’t get it right. I know I can make a pie, and make it well, but now I have to work for it. This then triggers my OCD and anxiety (both of which I’ve been diagnosed with), and now I cannot rest until I get it right again.
It’s actually maddening, but after weeks and months of testing a recipe, I walk away pleased with my outcome, and confident about sharing it with others. It’s rather a daunting process (I should have just gone to pastry school?) but I’ve always learned best from my mistakes, and repeating something over and over until I really understand it.
I made pie after pie after that first round, but never found any consistency.
Pies are tricky that way – so much depends on the fruit, and fruit isn’t consistent. Fruit changes; it’s taste and texture evolves as it sits, and this can effect how the filling tastes and thickens.
At the time, I wasn’t ready in my baking journey to mess around with that extra element, and so I threw in the towel and moved on to something else.
But pies came back into my life when I decided to write a cookbook. There was to be a whole chapter on pies and tarts, and so I was going to have to figure out how to make a pie that was worth making and eating. I had made plenty of tarts, and crisps and crumbles in my baking career, but was able to avoid pie successfully. Now I had to face them. I spent months (and months) making pies. I checked out every possible pie-making book from the library, and read and watched everything I could. Nothing was working well for me. Sometimes the filling would be perfectly cooked, but the crust would be soggy. Sometimes the crust would be flaky and buttery, but the filling under baked and runny.
Finding the Perfect Fruit Pie Technique
I finally decided to try a method I had been putting off – a method that Rose Levy Beranbaum came up with in her cookbook, The Pie and Pastry Bible. It involves tossing the peeled and sliced fruit with sugar, and letting it sit until the fruit releases its juice. After straining the juice, it is then boiled down into a syrup and then mixed back in with the fruit. I hadn’t wanted to experiment with this because it seemed like so much extra work, but when I tried it, something clicked. Releasing the fruit juice and then cooking it down helps control how much liquid is in the filling, which solves so many problems. The fruit syrup also is a much more concentrated flavor, which is another added benefit.
I played on Ms. Beranaum’s idea, and added a bit more sugar to the syrup as it cooked, and then added liqueur, vanilla, and a little butter. Sometimes heavy cream was mixed in, to balance the fruit’s sweetness or tartness. I was also able to taste the syrup as I added things, so I could balance flavor before adding it to the fruit, which ensured a perfect filling.
This method, (as with anything) isn’t completely fool-proof; there are of course variables that can sneak up and ruin a pie. But I’ve found it gives me the most consistently delicious pies, and gives me room to play with different fruits without worry. Also, there are plenty of people making great pies without this method, and I don’t doubt it can be done. But I’ve found for myself that the extra work involved here was completely worth it, and I finally feel passionate about making pies, and sharing pies.
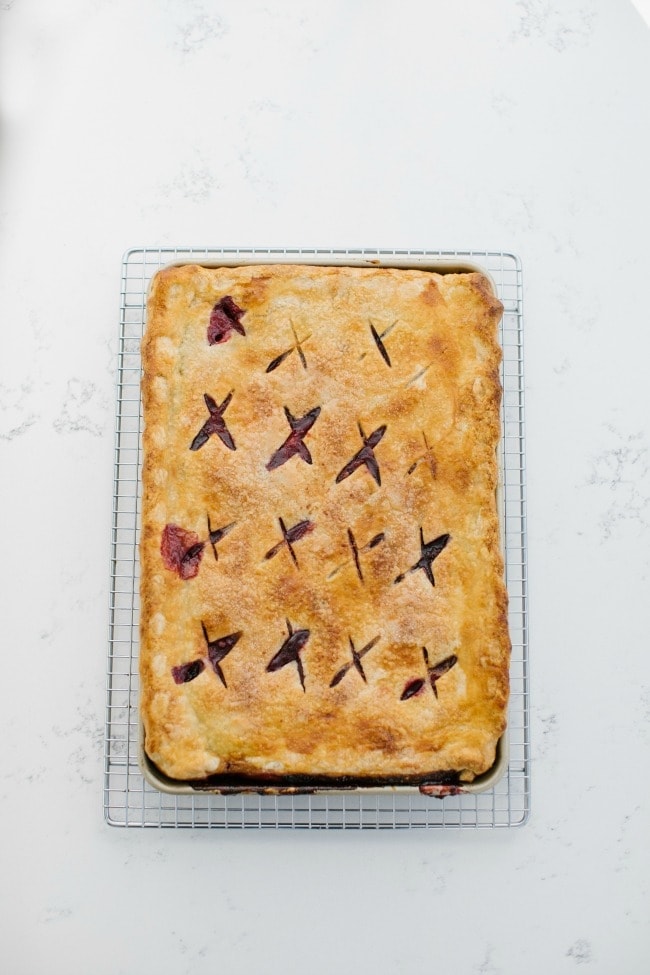
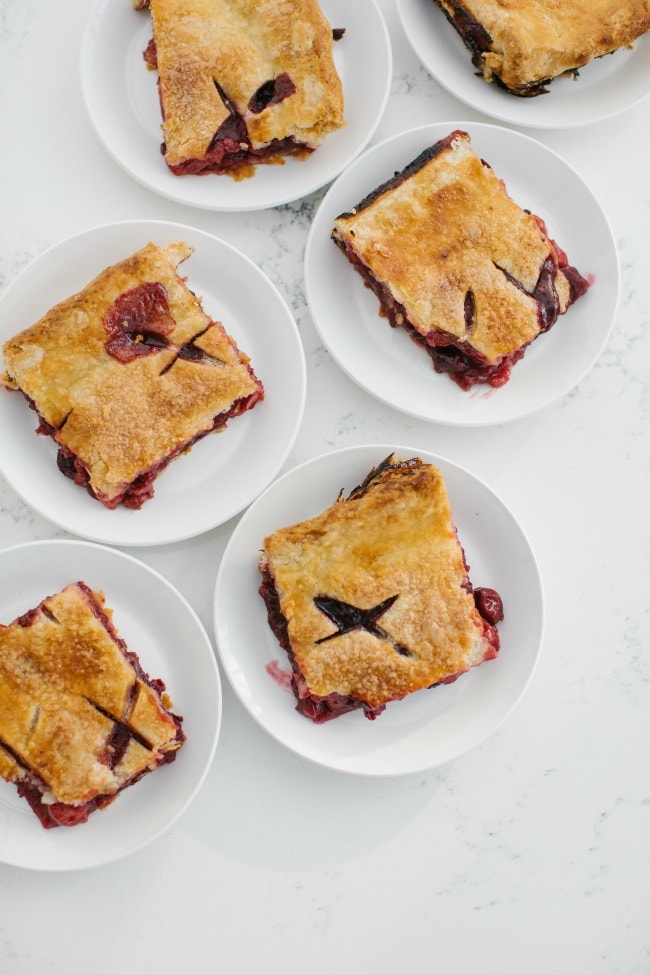
CHERRIES + CREAM SLAB PIE
This slab pie is adapted from my cookbook, The Vanilla Bean Baking Book. I almost always recommend fresh fruit for pies, but I’ve found frozen cherries to consistently work well for me (especially in the winter months). If using frozen, toss the cherries with the sugar and salt frozen, and let them sit until they come to room temperature (this may take a few hours).
If you like some tart cherries mixed in, you can use a mixture of each (although you may want to add a little more sugar, a tablespoon at a time – taste to see.) If your cherries are still releasing a lot of juice when the cooked juice is added back to them, add an extra tablespoon of cornstarch (for a total of 5 tablespoons) to the fruit mixture.
Tips for Making a Great Fruit Pie:
- Overall I like cornstarch as a filling over flour and tapioca. Flour seems to muddle the flavor, and and tapioca makes the filling too jelly-like for my tastes. Cornstarch kept the flavor pure and thickened without being gummy.
- I also add a grated Gala apple to every pie I make (except, apple pie, ha). This is a trick I learned from Cooks Illustrated: a peeled, grated apple contains a good amount of pectin, which helps thicken the filling. This means I don’t have to use as much cornstarch. The sweetness of the apple also balances any tart flavors in the filling without having to add extra sugar. I find it a win-win situation, and no one ever notices the apple in the pie.
- I also use an all-butter crust. I prefer the flavor of the butter, and didn’t miss the shortening when experimenting.
- I like a little sugar in my dough, for sweetness and browning, and I fold the dough a bit at the end to help ensure flaky layers.
- A glass pie plate and a preheated baking sheet ensures a crisp, golden brown crust (the glass also helps me peek at the crust to see when it is done).
More Pie Recips:
Cherry Slab Pie
Ingredients
Double Crust Pie Dough
- 18 tablespoons unsalted butter, cold, cut into 16-24 pieces (255 grams)
- 3 1/4 cups all-purpose flour
- 2 tablespoons sugar
- 1 teaspoon salt
Pie Filling
- 10 heaping cups pitted sweet cherries (1300 grams)
- 1 cup peeled and grated Gala apple, about 2 small apples (150 grams)
- 1/2 cup granulated sugar plus 1/4 cup, plus 1-2 tablespoons for sprinkling
- 1/4 teaspoon salt
- 2 tablespoons unsalted butter
- 1 tablespoon kirsch optional
- 1 teaspoon pure vanilla extract
- 2 tablespoons heavy cream
- 4 tablespoons cornstarch see note
- 1 teaspoons lemon juice
- 1/8 teaspoon ground cinnamon
- Egg wash (1 egg, 1 tablespoon water, and a pinch of salt whisked together)
Instructions
- Put the butter in a small bowl and place it in the freezer. Fill a medium liquid measuring cup with water and add plenty of ice. Let the both the butter and the ice water sit for 5 to 10 minutes.
- In the bowl of a stand mixer fitted with a paddle, mix the flour, sugar, and salt on low until combined. Add half of the chilled butter and mix on low until the butter is just starting to break down, about 1 minute. Add the rest of the butter and continue mixing until the butter is broken down and in various sizes (some butter will incorporated into the dough, some will still be a bit large, but most should be about the size of small peas). Stop the mixer and use your hands to check for any large pieces of butter that didn’t get mixed or any dry patches of dough on the bottom of the bowl; break up the butter and incorporate the dry flour as best you can. With the mixer running on low, slowly add water a few tablespoons at a time and mix until the dough starts to come together but is still quite shaggy.
- Dump the dough out on a lightly floured work surface and flatten it slightly into a square. Gather any loose/dry pieces that won’t stick to the dough and place them on top of the square. Gently fold the dough over onto itself and flatten again. Repeat this process 3 or 4 times, until all the loose pieces are worked into the dough. Be very gentle with your movements, being careful not to overwork the dough. Flatten the dough one last time into a rectangle and cut into 2 pieces. Form the pieces into 6-inch discs and wrap in plastic wrap and refrigerate for 30 minutes before using.
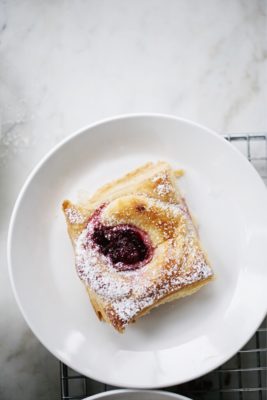
- (For the fold-over pie crust shown above, instead of dividing the dough into two pieces, pinch off one-quarter of the dough, and save for another use. Pat the rest of the dough into a disc, and wrap with plastic until ready to use.)
For the Slab Pie Filling
- Combine cherries, grated apple, 1/2 cup of sugar, and salt in a large bowl. Let sit 30-45 minutes at room temperature.
- Strain the sugary juice from the fruit into a medium saucepan (you should have at least ½ cup of juice). Return the fruit to the large bowl. Add 1/4 cup granulated sugar to the juices in the pan and bring to a boil over medium heat. Simmer until reduced to a scant 1/2 cup, about 5-6 minutes, shaking the pan occasionally to stir. Remove from the heat and whisk in the butter. Stir in the kirsch and vanilla, then the heavy cream. Set aside to cool slightly.
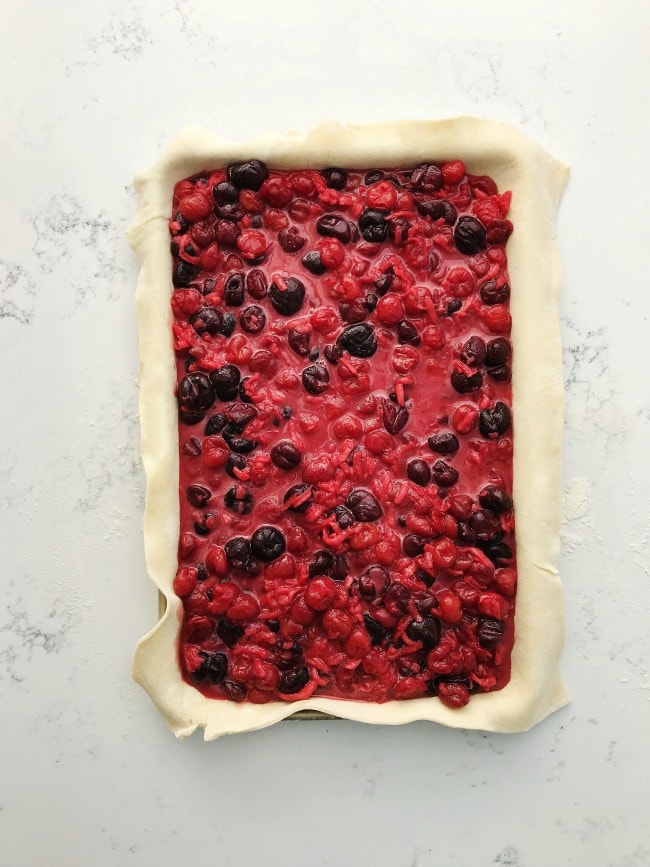
- Sprinkle the cornstarch, lemon juice, and cinnamon over the cherries and toss to coat. Pour the slightly cooled fruit juice mixture over the fruit and stir gently.
To Assemble and Bake the Cherries + Cream Slab Pie
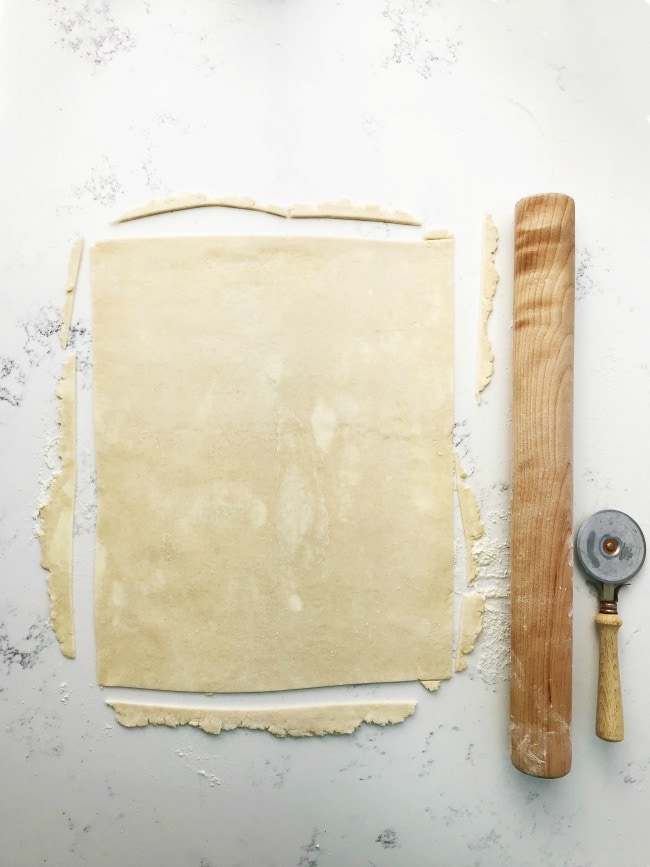
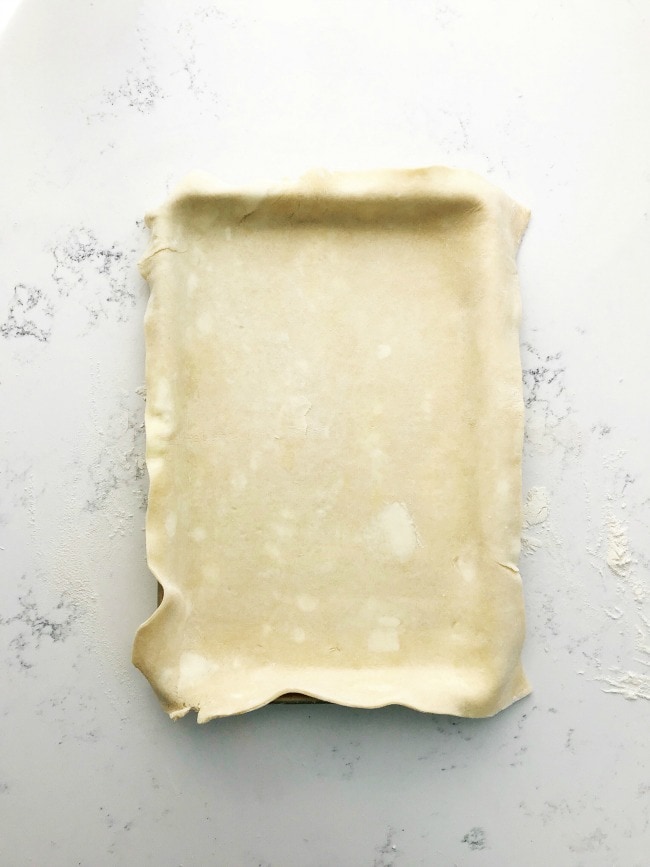
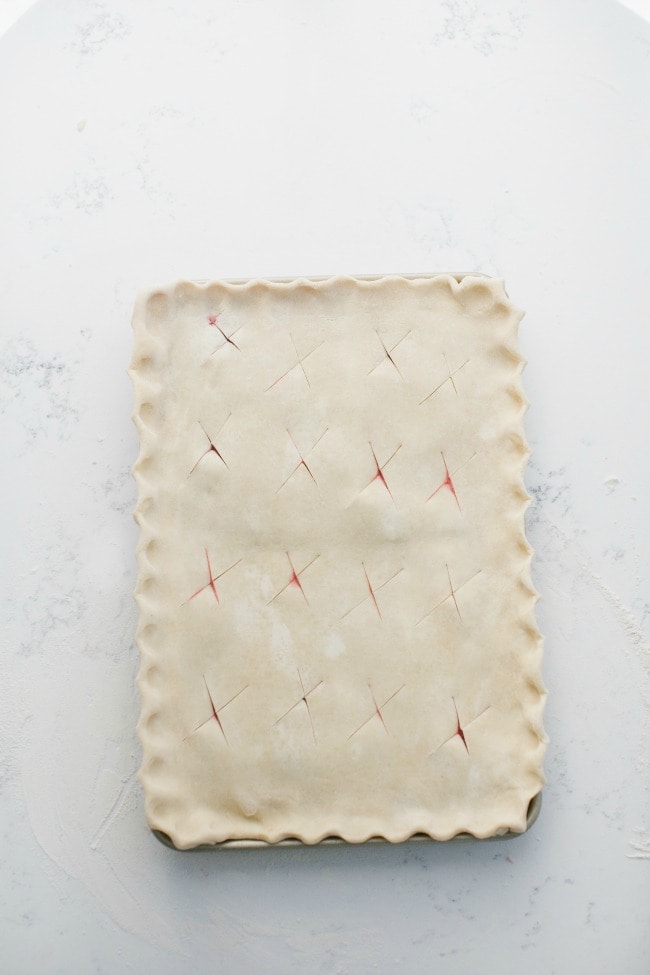
- Lightly flour a large sheet of parchment paper, and roll one piece of dough into a 17 by 13-inch rectangle. Repeat with the second piece of dough. Using the parchment paper, transfer one rectangle to a 13 by 9-inch jelly roll pan or quarter sheet pan. Press the dough into the pan; discard the parchment. Pour the filling on top of the dough and spread into an even layer. Using the parchment paper, place the second rectangle of dough on top of the filling; discard the parchment. Trim the dough overhangs to 1 inch past the lip of the pan. Pinch the dough together and tuck it under itself. Crimp the edges and cut several x-shaped vents across the top of the dough. Place the pan in the freezer for about 20 minutes while the oven is preheating. You want the crust to be nice and firm before you bake it.
- Adjust an oven rack to the lowest position. Preheat oven to 425°F. Place a baking sheet large enough to hold the jelly roll pan on the oven rack (the preheated baking sheet helps crisp the bottom of the pie crust and catches any leaks and drips).
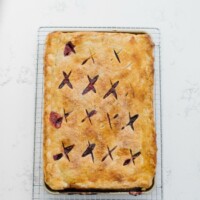
- When ready to bake, brush the top of the slab pie with egg wash and sprinkle with 1 or 2 tablespoons of granulated sugar. Put the pie plate on the preheated baking sheet and bake 25 minutes. Reduce the oven to 375ºF and bake 40 to 50 minutes, until the crust is deep golden brown and the juices bubble.
- Transfer the slab pie in its pan to a wire rack and let cool at least 4 hours before serving.
13 Comments
Mindy Swagel
Sunday, July 4, 2021 at 7:16 pmShould the grated apple be drain of the juices once’s grated?
Floranet
Wednesday, July 10, 2019 at 1:35 amI think it’s just great!! Incredible work!!
Ann
Sunday, May 26, 2019 at 4:12 pmThanks for this post, Sarah – we have perfect first apple pies in common (my dad even said mine was better than my mother’s – highest compliment). But after that? Definitely hit or miss! Also – cornstarch every time over flour or tapioca – agree completely. Will try your method for filling – need a cherry pie in my life right now.
Whitney
Sunday, May 26, 2019 at 7:52 amAnother great post – thank you.
My all time favourite pie is sour cherry pie so I will be making pie with this recipe. Years ago (25+) I took a baking course at George Brown College in Toronto. The night we made apple pie was a game changer for me. We peeled and sliced half of the apples and put them in a colander with 1/4 cup of sugar and a bowl underneath to catch the juices. Finish the rest and add a second 1/4. Then we covered the colander with plastic, a plate on top, and weighted container like a tin of tomatoes. We left it for an hour. The juice was then put on the stove with – 1/4 cup cornstarch, pinch of salt, and cinnamon. Bring to a boil (very thick), then add 1/2 cup sugar and mix well. At the very end – add 1tablespoon of butter. This mixture was dumped over the apples (now in the bowl). Works most of the time except for the unknown variables. Your article has taught me to do this with all fruits which release juice. Thank you.
S
Monday, June 4, 2018 at 9:34 pmI made a variation on this pie over the weekend and the technique to make filling by reducing the sweetened fruit juice and adding it to the cornstarch-dusted fruit is awesome. I used frozen peaches instead of cherries and skipped the cream and kirsch. It’s a little time consuming, but the fruit was perfectly cooked from the baking time (not overcooked like par-cooked fillings tend to be) and the pie “goo” was thick and clear without being gluey. I used the same amount by weight of peaches (1300g) and grated apple (150g) and the quantity was just right to fill the 9×13 pie. The crust is good too and rolled out very easily. I took the pie into work and my coworkers and I really liked it.
Vita
Sunday, May 6, 2018 at 10:49 amIt looks yummy !
Vanessa
Saturday, April 21, 2018 at 7:46 pmMaking this tonight but I’m unclear as to whether this is made in the quarter sheet or half sheet?
Claudia | The Brick Kitchen
Sunday, February 18, 2018 at 2:24 pmI’m glad I’m not the only one whose pies have been a little hit and miss at times! I haven’t tried that cooking technique for the fruit before so will definitely give that a crack next time. And a slab pie is so simple and effective! Another to add to the to-try list. Thanks for the tips Sarah!
Christiann Koepke
Sunday, February 18, 2018 at 12:41 amI love this new way to make pie!! This is so cute too. Can’t wait to make this! -CK
Kelsey @ Appeasing a Food Geek
Tuesday, February 13, 2018 at 5:41 amUgh I’m so glad you shared that you were not always a pie queen, because I find it the most difficult thing to make! I was actually very surprised when I made your pie during the book recipe testing, and it wasn’t a total disaster! So you truly are a pie whisperer I think 😉 xo
Natalie
Monday, February 12, 2018 at 10:41 pmI love cherries and this pie looks delicious and so easy to make!
kelli winter
Monday, February 12, 2018 at 3:46 pmThis post totally resonates with me!
First because I have just started making my own sourdough bread at home. The first loaf came out absolutely perfect. The second time, I don’t know what happened, maybe I added to much water by mistake, maybe the flour was off, I don’t know, but it never turned into bread. I’ve got my third try resting in the fridge right now, and they looks beautiful, but still a little different than the first try.
This has happened to me countless times, with so many different kinds of recipes. I’m so glad to know I’m not the only one!. I usually bake a third time, sometimes it works, then that recipe will be in rotation, sometimes it doesn’t and I will give up on it.
One thing that I do know, and it is frustrating, is that pie and bread are notorious for being finicky. Every baker struggles with these. They rarely come out the same every single time.
I bake pies for a living, and I definitely have times when they don’t come out as they should. For unknown, uncontrollable reasons, as if the pie has a mind of its own. The best we can do is find a method that works 99% of the time and just shrug it off when it fails. Try again and never change more than one variable at a time. I also found that if I don’t try the recipe again right away after a fail, I most likely won’t go back to it ever again.
Baking and cooking are so rewarding, I am very grateful to call myself a baker and a cook. It’s a creative outlet. It feels good to feed people. When someone enjoys something I’ve made, there is no better feeling. And then there is the whole factor of using locally grown ingredients, teaching others why it is important to do so, supporting our local economy, our neighbors and our planet. Working with local food is a very important shift in our culture and of our understanding of how to feed ourselves. I am proud to be a part of that.
Vickie
Monday, February 12, 2018 at 3:23 pmExcellent!
And, your recipe too.
My sweet hubby loves Cherry anything. I will make this one!
Thanks.